
Recently, I found a method to flash a "hex" file into Arduino Nano, by using "avrdude" running on a Raspberry Pi. In my case, I have an Arduino Nano connected, via USB, to a Raspberry Pi 3 B. The Raspberry Pi is connected to my home network using an Ethernet cable. I am developing the software using Arduino IDE, on my PC running Windows. But when I want to flash the software,
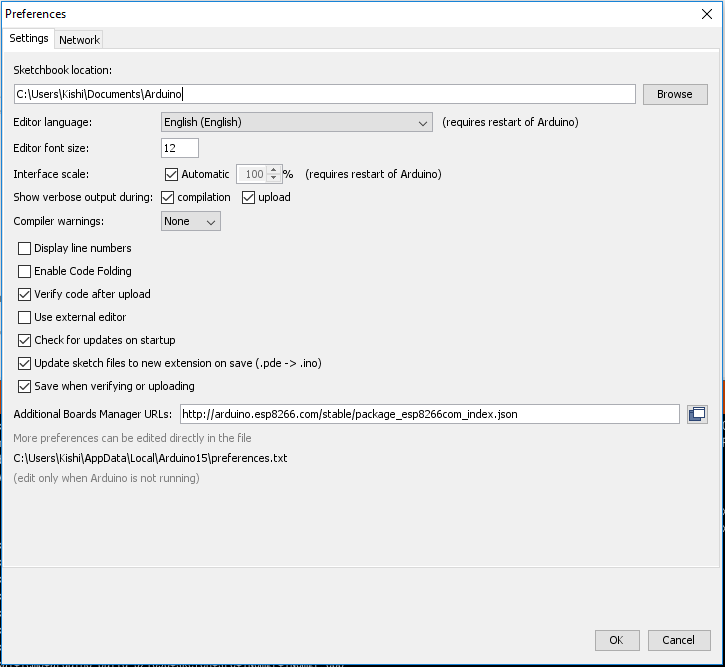
The first step is to set Arduino IDE preferences to verbose the "compilation" and "upload" commands (it is necessary to check the 2 options shown below).
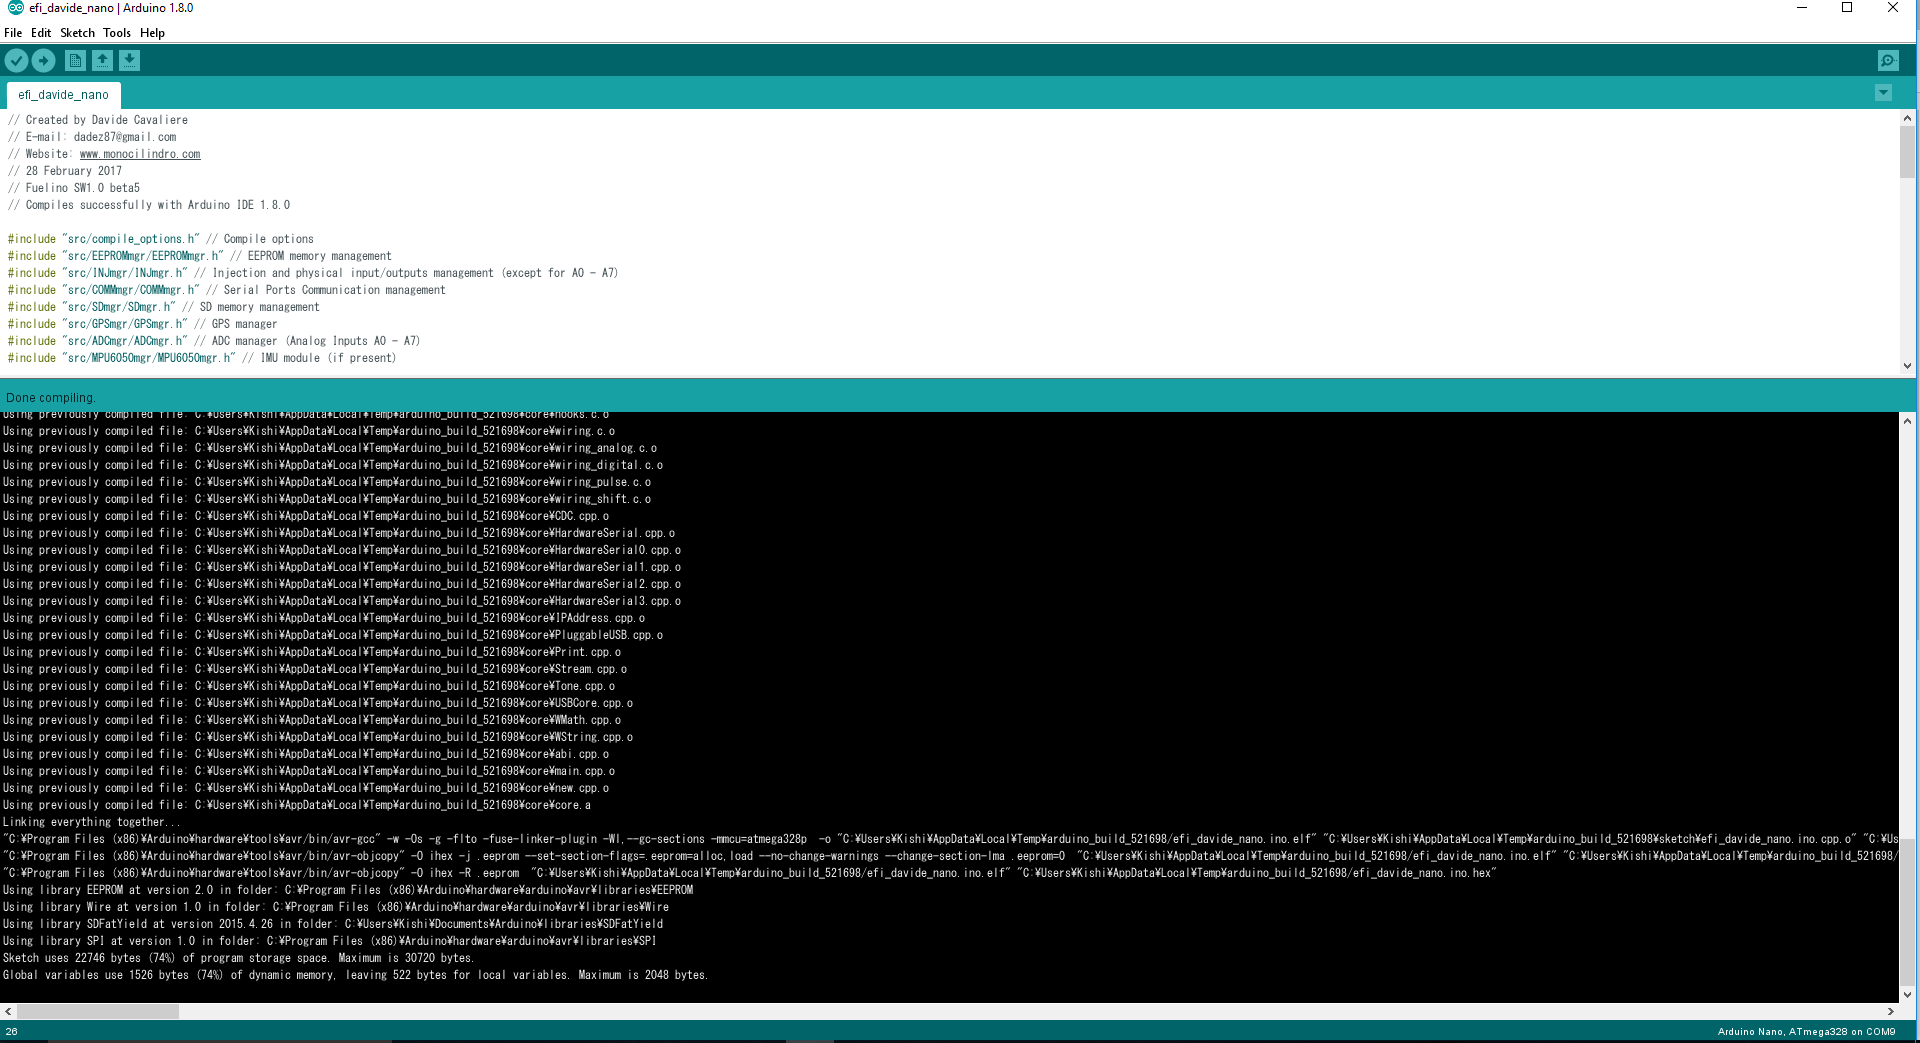
 After that, when compiling the sketch, Arduino IDE shows the following info. You need to find out what is the folder in which Arduino IDE stores the "hex" file. In my case, the "hex" file is stored at path "C:\Users\Kishi\AppData\Local\Temp\arduino_build_521698/efi_davide_nano.ino.hex".
 The following file "hex" file has to be copied on the Raspberry Pi, for example using Samba.
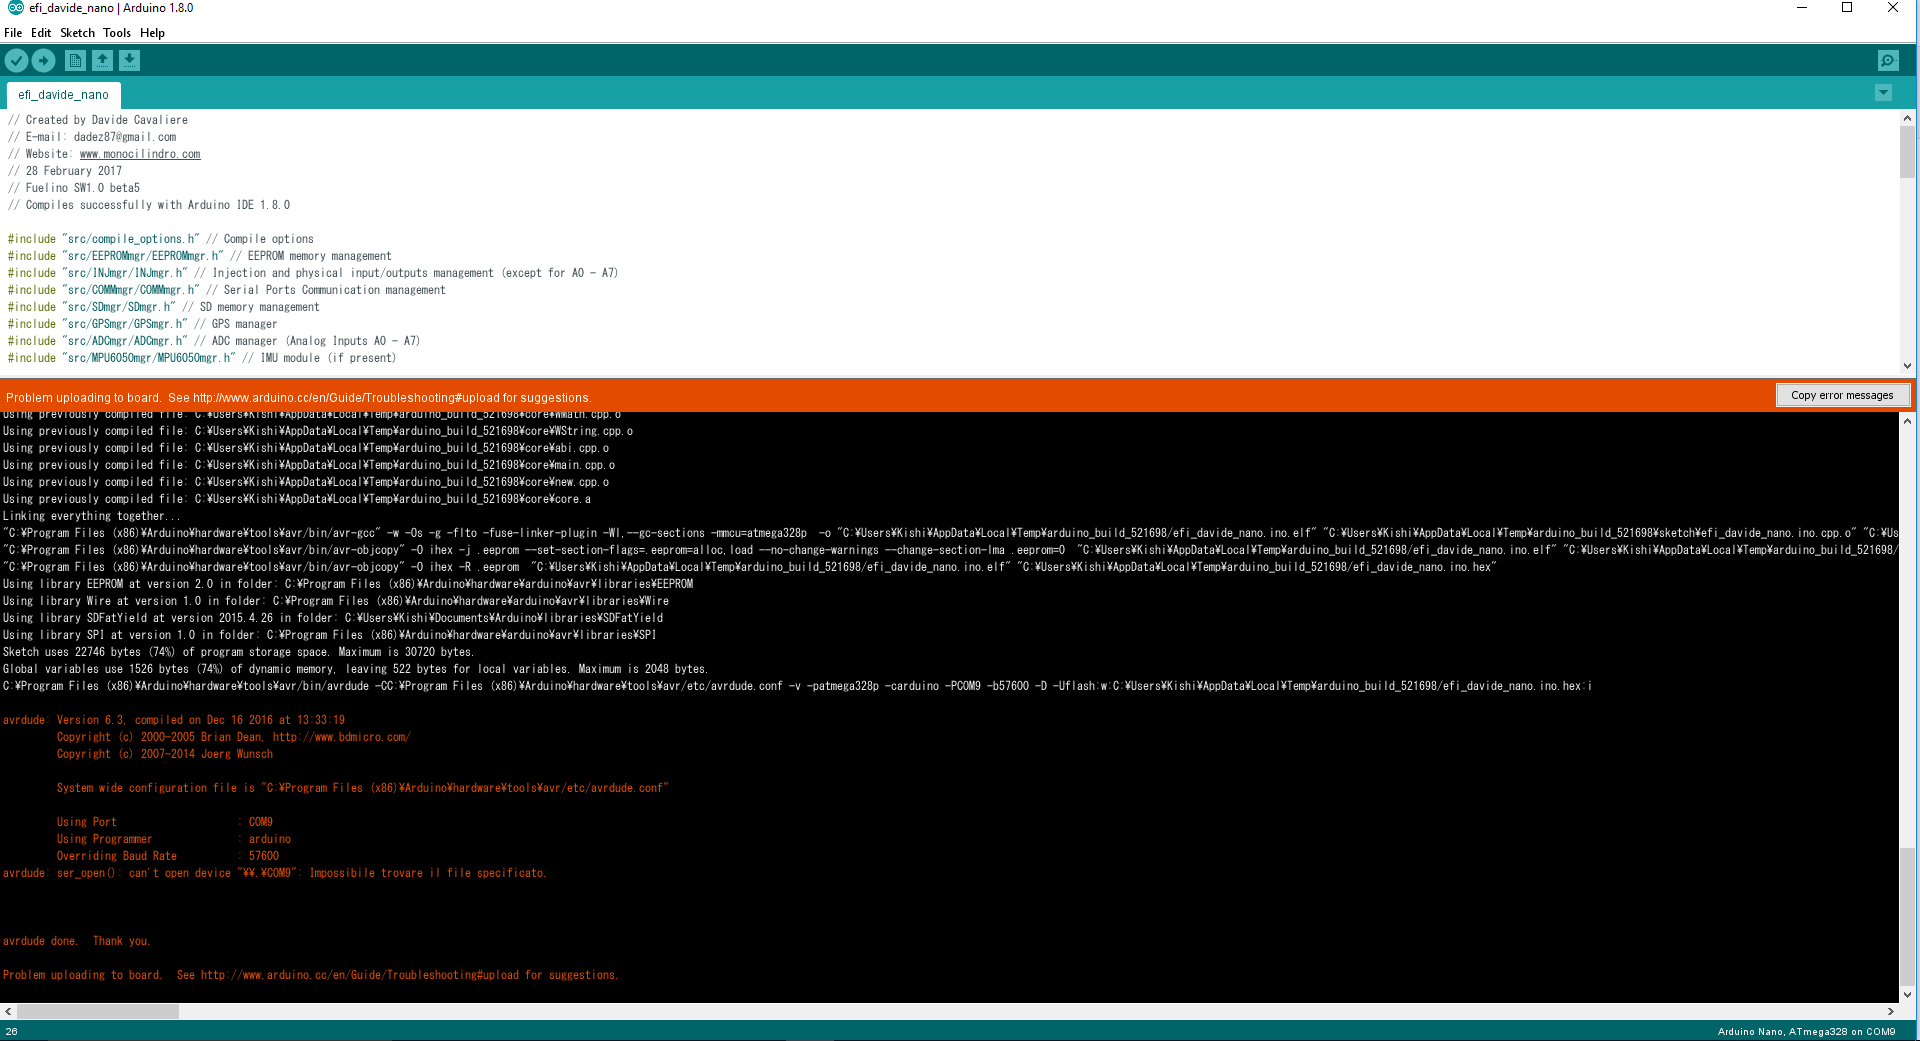
 The next step is to find out which is the "avrdude" command used by Arduino IDE to flash the "hex" file into Arduino. We also need to find out the location in which the "avrdude.conf" file is located.
In my case, the command was: "C:\Program Files (x86)\Arduino\hardware\tools\avr/bin/avrdude -CC:\Program Files (x86)\Arduino\hardware\tools\avr/etc/avrdude.conf -v -patmega328p -carduino -PCOM9 -b57600 -D -Uflash:w:C:\Users\Kishi\AppData\Local\Temp\arduino_build_521698/efi_davide_nano.ino.hex:i".
 After that, I copied the file "avrdude.conf" from my PC into the Raspberry Pi, using Samba.
 Then, connect Arduino to the Raspberry Pi, and check the USB serial device name which has been given to Arduino Uno/Nano. In my case, the device name is ttyUSB0.
cd /dev/
ls

Before flashing the "hex" file, it is necessary to have avrdude installed on the Raspberry Pi. To do that, just type the following.
sudo apt-get install avrdude
In order to flash the "hex" file into Arduino Nano, I used the following command. Basically, I just revised the Arduino IDE command by modifying the name of the serial port (/dev/ttyUSB0) and the file paths. It is important that you place the hex file and avrdude.conf in the same folder, and launch the command from the same path.
avrdude -C avrdude.conf -v -p atmega328p -c arduino -P /dev/ttyUSB0 -b 57600 -D -U flash:w:efi_davide_nano.ino.hex:i
 In case everything was correct, you should see these messages on the shell. Avrdude is at first flashing the software (writing) and then reading the data which was flashed in the microcontroller.

Nice tutorial. I just flashed my Arduino UNO from the Raspberry Pi 3 Model B+. I kept getting this error...
"avrdude: stk500_getsync() attempt 1 of 10: not in sync: resp=0x00"
The problem ended up being that I needed a higher baud rate. This worked for me...
"avrdude -v -p atmega328p -c arduino -P /dev/ttyACM0 -b 115200 -D -U flash:w:Blink.ino.hex:i"
Cheers!
Hi Davide Cavaliere,
thank you very much, nice tutorial.
keep it up.
hi Jason,
me also use baud rate 115200 to get it working.
regards,
Thanks a lot Davide, it just helped me flashing a hex file remotely from a pi to an Arduino Pro Mini!
Thank you! It helped me a lot!
Thanks alot for this tutorial. Was really getting in knots trying to work out if I could flash my Arduino Nano from the OrangePi it connected to and your method worked first time!