Today I have the pleasure to show you my latest project: Fuelino. The name comes from "Fuel" and "Arduino". The unit is a fuel controller for single cylinder engines, and it is addressed especially to small engine motorcycles and scooter (less than 250cc). The unit gives you the opportunity to modify the fuel injection control, which becomes necessary after changing some engine parts, such as installing a bore up kit, or changing the air filter, exhaust pipe, camshaft and so on. The functions available are pretty similar to the ones of a Power Commander unit, but the price is 5-10 times lower.
 Last year, I already created a fuel control unit for my motorcycle, Honda CBR125R, but it was only an experimental project, despite it was properly working (I run 2000 km on my motorcycle up to now). Since that project was successful, I decided to create a PCB and manufacture it in China, and this is the result. The fist prototype (Proto 1), which you can see in the picture, has been assembled today.
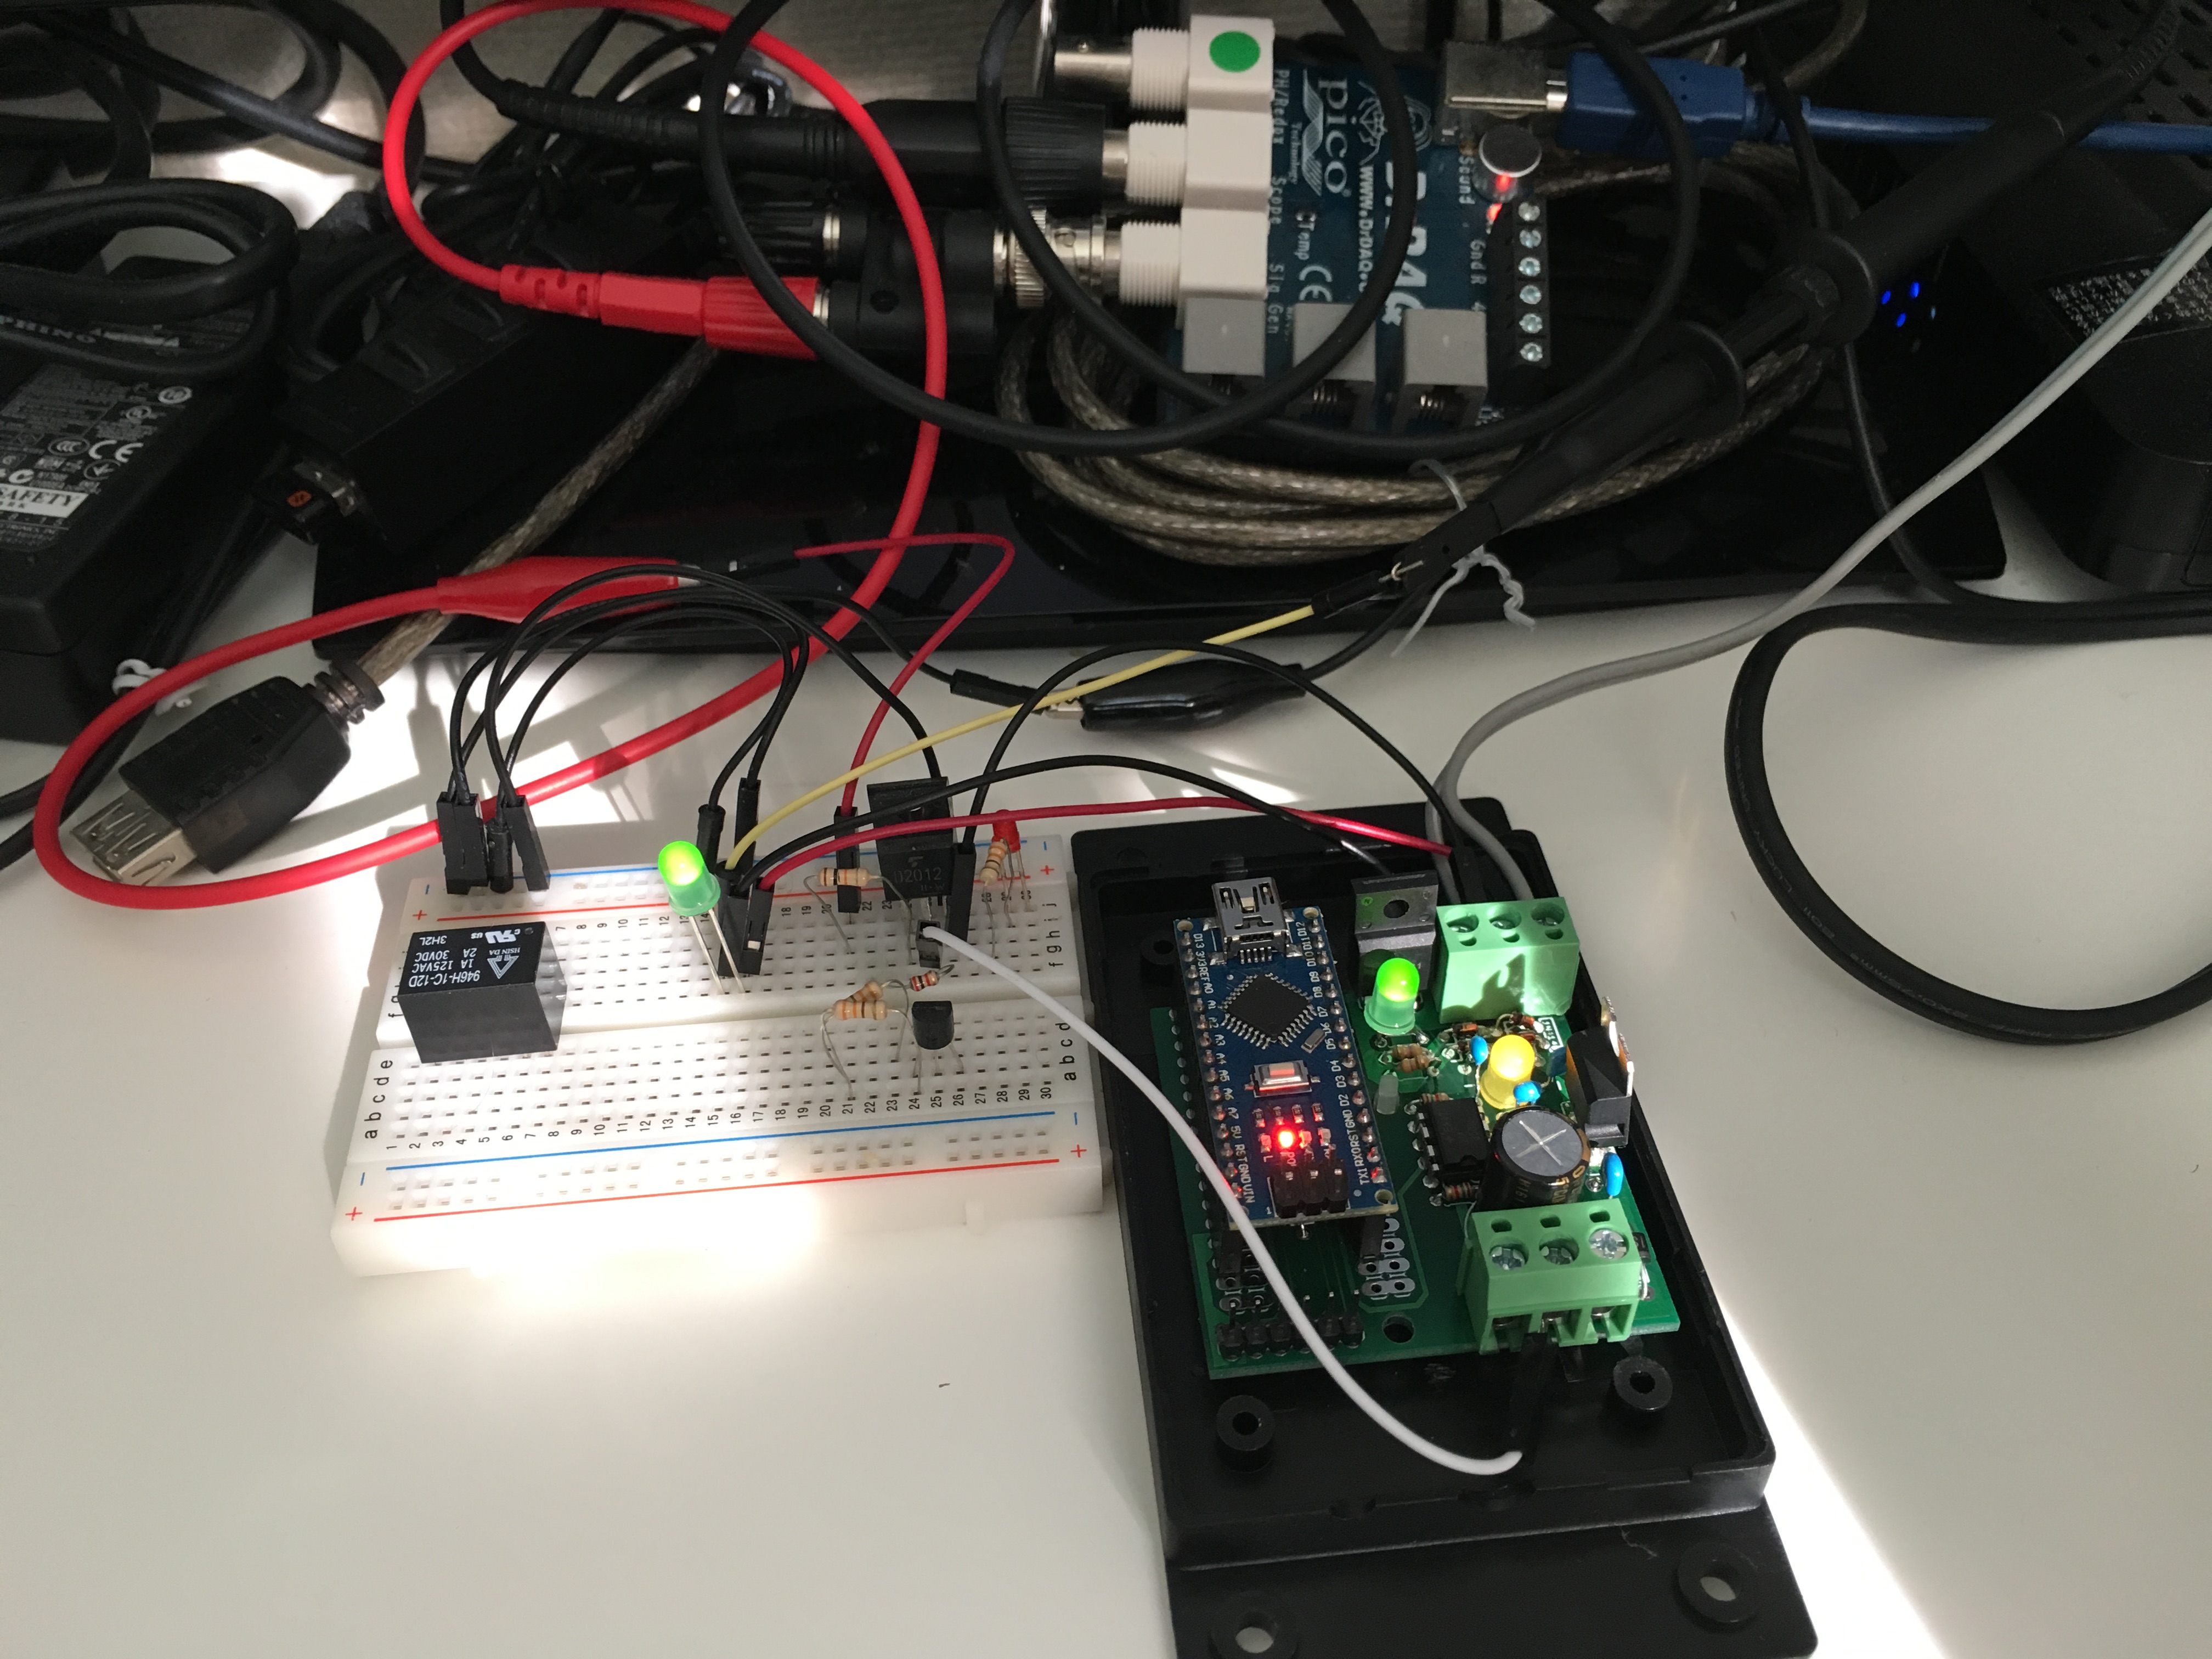
 After finishing soldering, I tested it using a signal generator and oscilloscope (Pico DrDaq). The signal generator simulates the original ECU injection command, Fuelino acquires it, elaborates it and finally creates the output signal for the real injector. since I do not have injectors on my desk, I used a 12V green LED, and a 12V relay. A relay has properties similar to an injector: it has a resistance, inductance, and it is an electromechanical system, as an injector; when the current flows into it, the electromagnetic force moves an anchor, which closes a secondary circuit. At first, I used only the relay, but since it was very loud when switching, I decided to use a LED instead. The only problem of using the LED as a load, instead of the relay, is that it does not have an inductance, so Zener diode clamping cannot be seen on the oscilloscope voltage signal, when using the LED.
 After testing the board on my in-house "HIL" (Hardware in the Loop) system, I even tried it working on my motorcycle, a Honda CBR125R. Since I had a limited time, I just did a quick "idle" check, and the Fuelino proto1 was working as expected! Since my engine mounts an Athena 166cc bore up kit, I set the injection time increment to 25%.
In case anyone is interested to test the kit on his motorcycle, I can provide some kits for free, for testing, please contact me at: dadez87(at)gmail.com. The software of Fuelino project will be open source, so you will be able to download the most recent software from my website, and flash it on the Fuelino microcontroller (Atmel ATmega328P) using Arduino IDE.
 Please notice that this controller does not have official homologation, so it is forbidden to use it on public roads. In case you decide to use this product on public roads, you can do it at your own risk (police may catch you and ask to pay money, or even take your vehicle).
Hello, I can see from your project that you have put considerable time and effort into the final poduct, well done, i am very interested to try this project for myself, i will see if i can get a ecu, my question is do you have any circuit boards already made and a list of components needed to make the board, i have the arduino boards, if so could you give a price.
BEST REGARDS PETER.
Hello Peter,
Thanks. The complete info about this project (including schematics, Gerber data, bill of material, and so on) are available here:
http://www.monocilindro.com/fuelino
I still have a Fuelino Proto3 board fully assembled, if you want I can give you, if you help me with testing and so on.
Which is your application? Are you going to put it on a motorcycle or on a car?
Please notice that Fuelino is compatible only with engines with 1 or 2 cylinders (up to 2 injectors) which support Electronic Fuel Injection.
Hi Davide, Thanks for the reply, i have a mini 1000cc on single carb, i have been programming pic/arduino microcontrollers for years now, and made many projects, what i like about yours is that its not all on one development board, which a good idea because if it goes wrong you have to replace the main board, i have made an ecu for a friend with a two cylinder go kart, i fabricated some parts like custom inlet manifold two injectors and two throttle bodies etc, the brain was developed using arduino mega 2560, after many hours testing it the results were good and it worked for him, that was when i lived in the uk, but now i live in france and i want to continue developing a similar system for the mini based on something along the lines what you have done, if i can help you in any way please contact me. best regards peter.
That sounds interesting. By the way, are you doing that for work, or for hobby? In my case, Fuelino is just a DIY project that I develop on my free time. This is also the reason why it is open source. I don't want to get money from it. I am investing money on this project to get experience about microcontrollers, PCB design, IMU (Inertial Measurement Unit) and so on. Creating your own PCB is pretty easy: you can use a free software called Eagle, which supports 2 layers (top and bottom). You create the schematic, and board, and then export the "Gerber" file and send it to a Chinese PCB manufacturer. They make 10 PCB (5cm x 5cm) for just 10 Dollars (+20 dollars for fast DHL shipping), which is pretty cheap. I really recommend to do that, in case you want to replicate your project.
Arduino Mega 2560 is more powerful, but I have never used it. The reason is that it is too big, expensive. For this Fuelino application, I didn't need for so much input/outputs. Anyway, recently I found out that the RAM memory of ATmega328p (the uC on Arduino Uno, Nano, ...) is not so much, only 2.5kB, therefore I had to optimize the code so much to reduce the size of array buffers, to reduce RAM consumption. I wish Arduino Nano had more RAM 🙂
I also thought to migrate to STM32 Nucleo-32, which has the same form factor of Arduino Nano, but it is more powerful. However, the price is higher, and also less available, and I would need to re-write from 0 a lot of C++ code.
Regarding your projects, do you have some more info? They sound pretty interesting. If you have any pictures, or links, please send them at my e-mail address.
Hi Davide, just a quick note all my development work is purely for hobbie, i intend to develope a intermediate system for my mini fuel injection project, its a single point inj carb ime using rover std, i have decided to use STM32F4XX its a very good development board and should prove to be ok, these boards i buy from http://WWW.BANGGOOD.COM at a fraction of the price and delivery is free, programed in C as you know, they have a lot of interesting features included, might be a good solution for you to, orange pi pc board also very capable board good graphics. I will send some pictures soon when unpacked everything, ime in the process of renovating my barn here in france.
I wanna install on a 212cc engine please help me ill purchase it from u directly please I need it to run onnigsbown no piggybacking an ecu S there isn't one
Wow, that sounds nice. STM32F4 is a powerful microcontroller. I am also interested in STM32, but I have never tried it up to now.
Which IDE do you use to program it? Is it Arduino IDE compatible, or do you have to use any other particular compiler/IDE from ST Microelectronics?
Please kindly keep in touch about the status of your project.
Hi Davide,
I'm fallowing your project. I want to transform my 2 stroke carburetor bike(Beta Xtrainer) into fuel injection. I don't have fuel injection pin like you do. I want to read signal from my reluctance pickup senzor(only 2 wire), but the signal is very low only 5 mV. Do you know how to read this signal with arduino nano?
Hello Davide Cavaliere,
Very nice project, I start to learn ECU development and test with my own bike.
Can you share me how to start to become ECU developer. I am software and web app. developer so no worry about programming but working electronic board is very new to me.
Thank you very much,
Is still available?? Any updates??