Some weeks ago, I received at home the second prototype of PCB for the Fuelino shield (compatible with Arduino Nano r3). Since all components are "through hole mount", and there are quite many, the soldering and testing phase required about 1 h.
First of all, I decided to solder the resistors (they are the components with the lowest height, same as diodes).
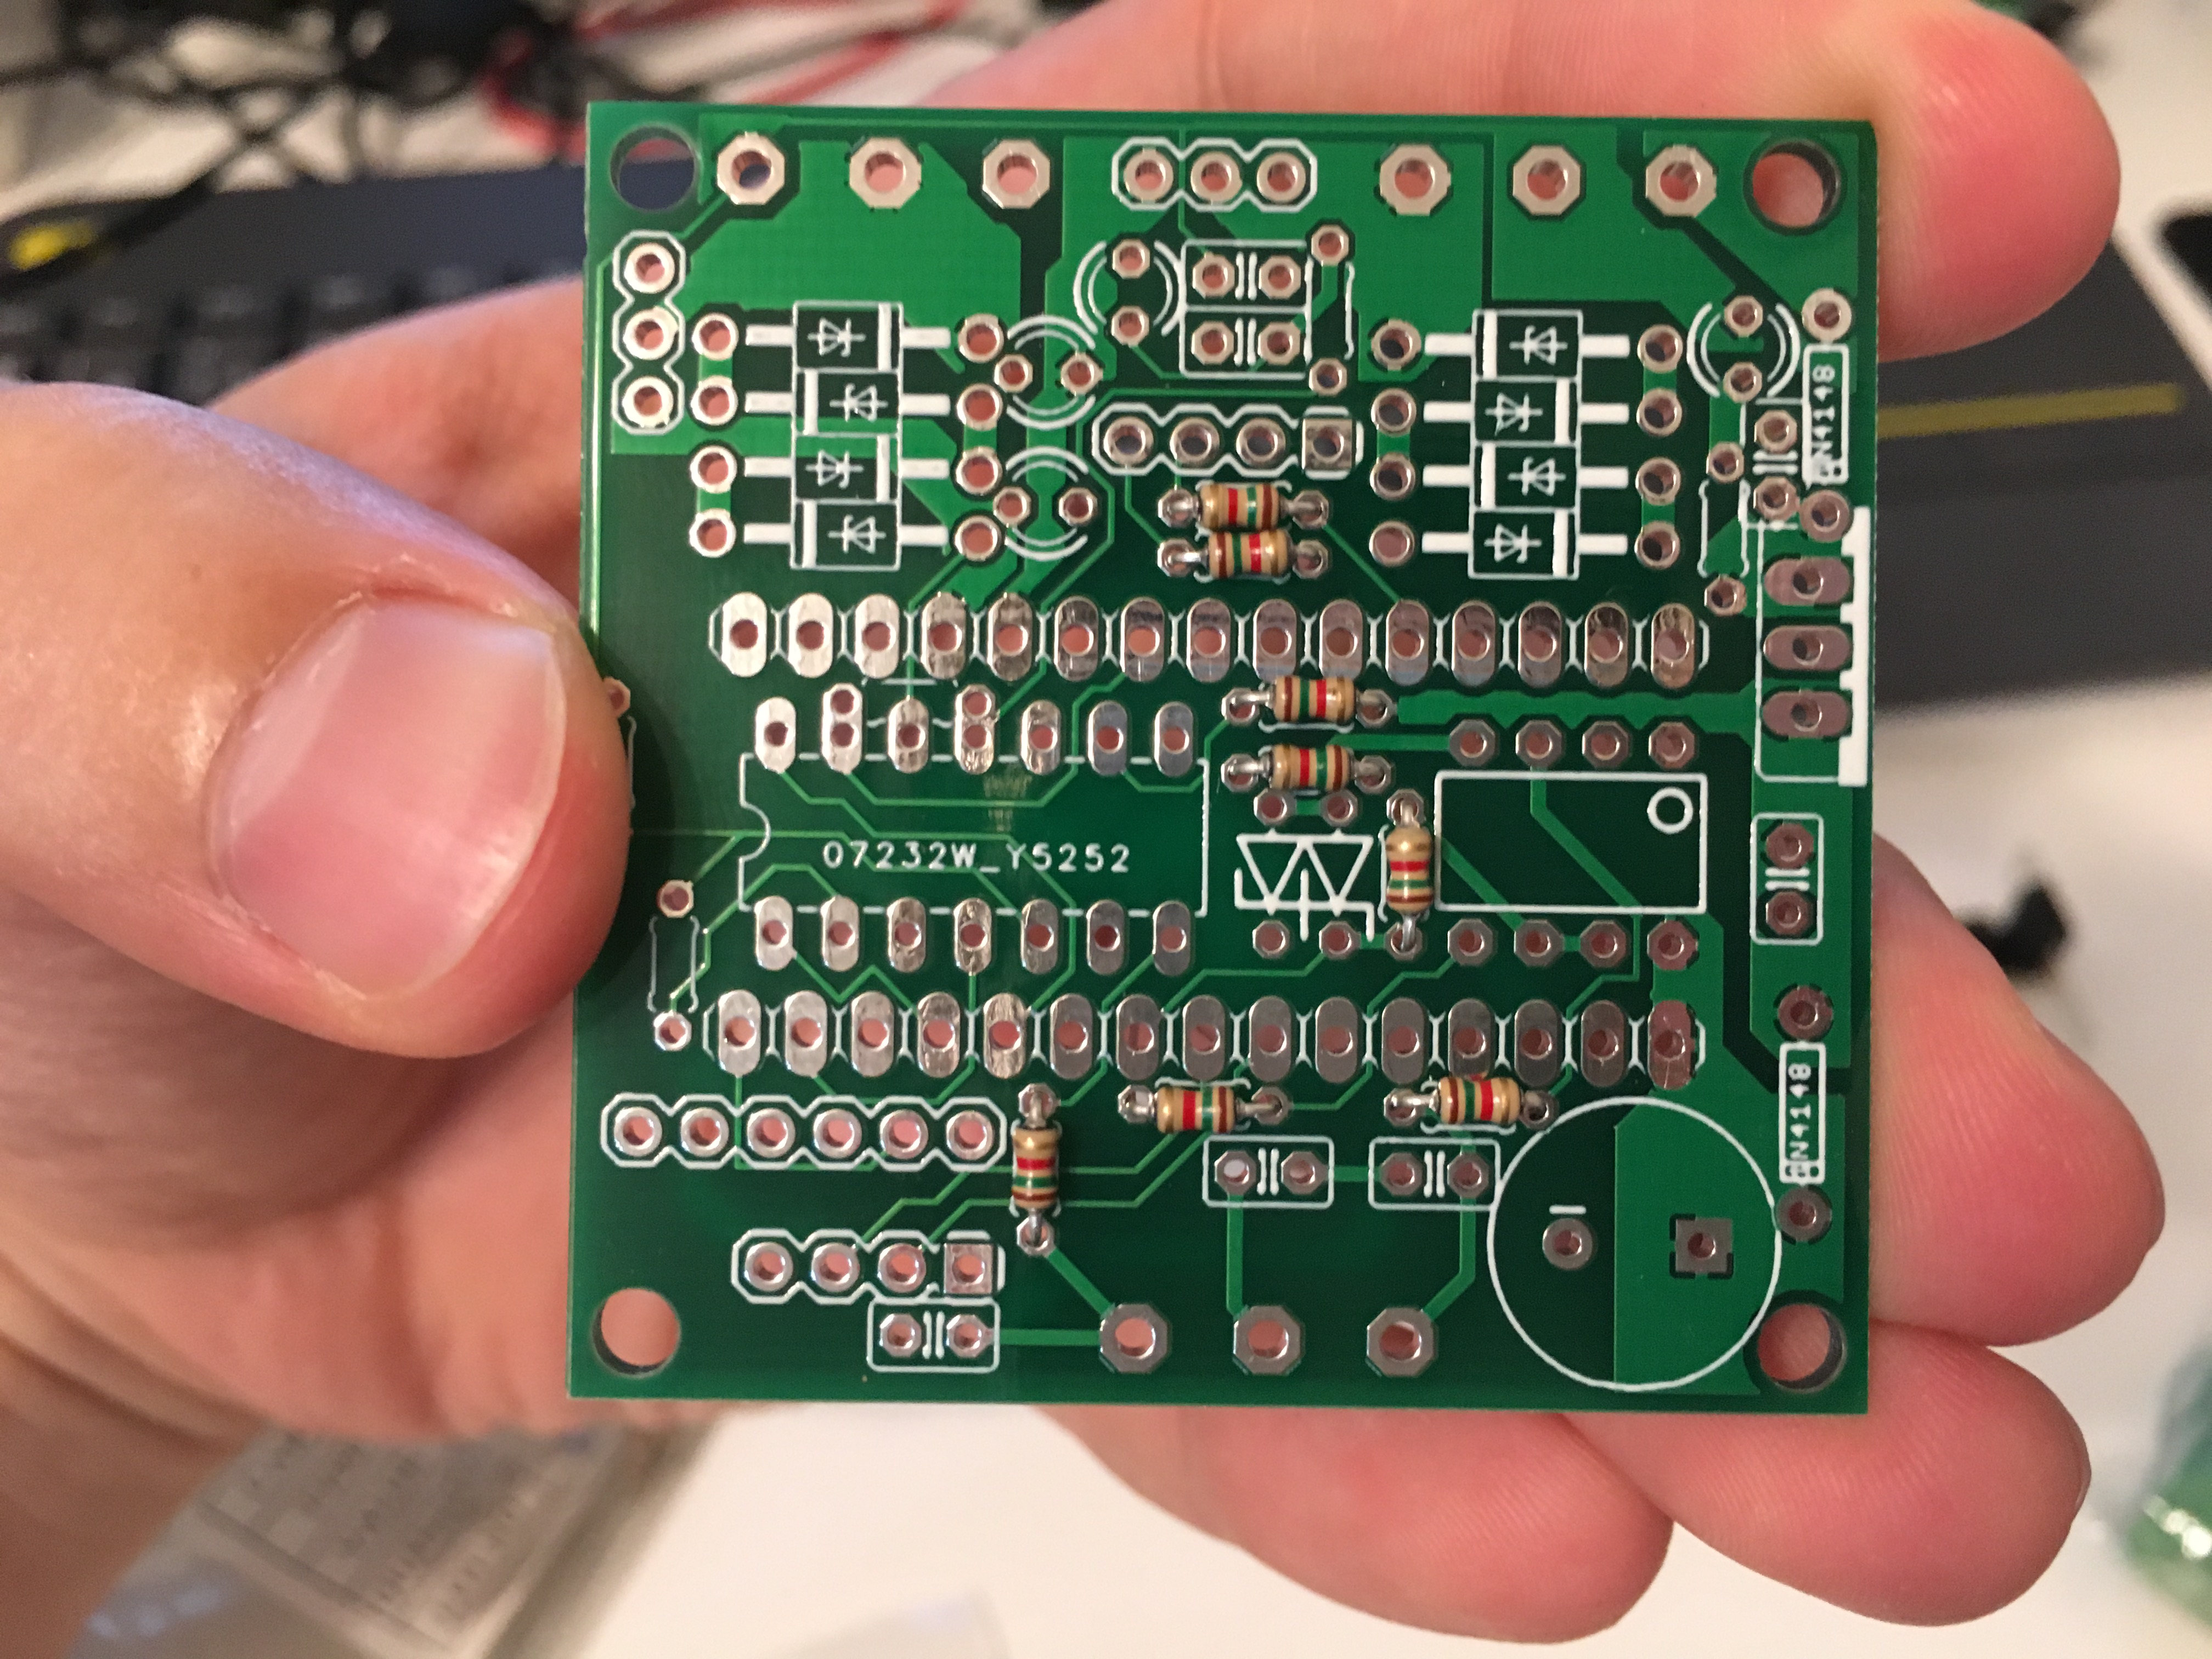 As the second step, I soldered diodes, small capacitors, and the 2 integrated circuits (LM339 and LM358). The LM339N, the bigger one, has 4 comparators, which are used to acquire the injector signal(s) coming from the original ECU (Honda CBR125R has a Keihin ECU); one input is used to acquire the status of the voltage at power IN (12V); and one input can be used to acquire a digital output signal (general purpose). The LM358 has 2 op-amps, which I use in buffer configuration, in order to acquire the Throttle Position Sensor (TPS) signal and "lambda sensor signals"; both input signals are optional, and can be used, inside the software, for injector control strategies, and for data logging.
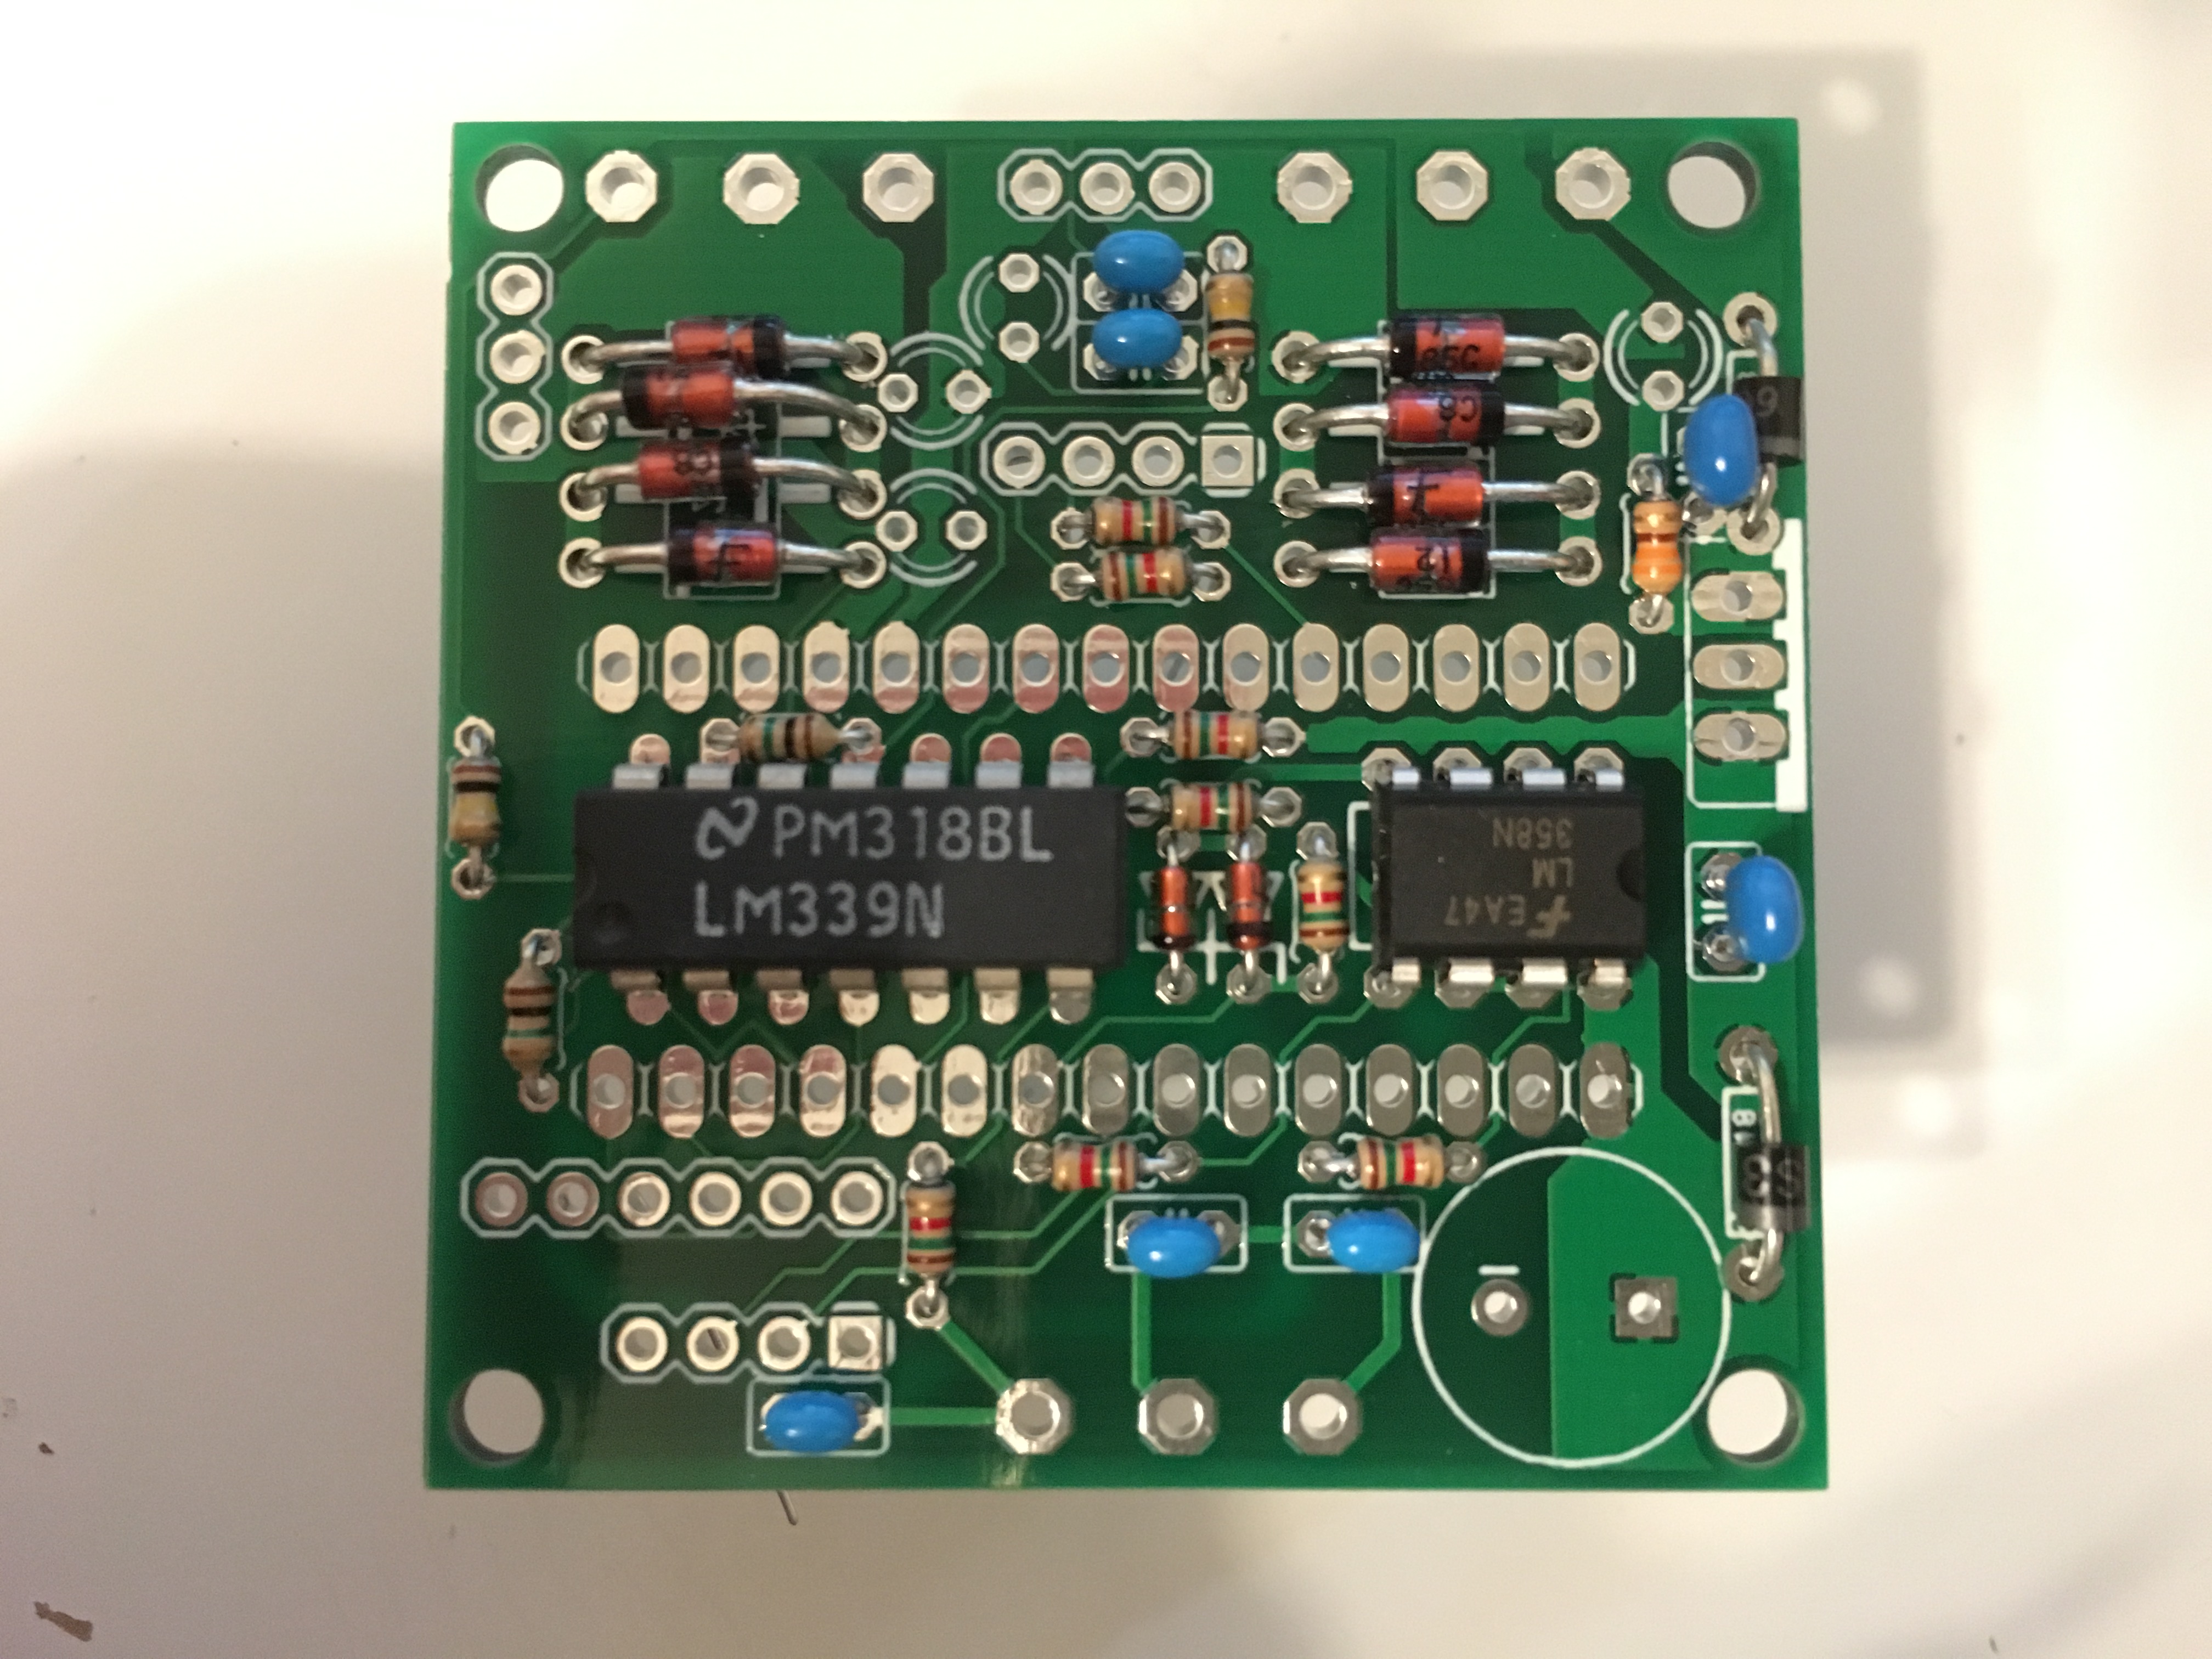 In the third step, I soldered the remaining components: 2 MOSFETS (FKI10531), 1 voltage regulator (L7809), connectors for external signals and power supply, and headers (for Arduino Nano rev3, and external modules).
 Finally, I mounted Arduino Nano Rev3, on its 15+15 pins socket. And that's how it looks, at the end of soldering and mounting operations. I know, I did some mistakes, which I am planning to solve in the next "proto3" PCB. And also, I did not mount the connectors very well.
- There is too few space around the LEDs, so I could not mount them properly. I had to mount 1 orange LED on the back of the PCB.
- The space between Arduino Nano board and the 9V voltage regulator is too small, there is no clearance, so I had to bend a bit the regulator (on the right side).
 Even if I am not 100% satisfied of the PCB and soldering, I am happy that this Fuelino Proto2 shield is working properly. I tested it, after loading the latest software, and it works fine. Also, I am impressed by the fact that, with such small cost (each PCB costs about 3 dollars, shipment included, and components are less than 10 dollars), it is possible to build a complete piggyback ECU (Engine Control Unit) controller, capable of managing and customizing the injector command. In my opinion, this is incredible: just 15 euros of material cost, and it is "hand made" in house. Big companies offer similar products, such as Power Commander, for 20 times this price (300 dollars or so). If your purpose is to control the injectors signal, and also to log data from your motorcycle (adding the additional micro SD card module from Catalex), this simple board is what you are looking for. It allows to:
- Control the fuel injectors signals, in order to customize the fuel injection quantity (injected gasoline quantity can be controlled by the injector command pulse width, using Fuelino).
- Log motorcycle data (engine rotation speed, throttle position sensor signal, lambda sensor signal, fuel injected quantity). With additional modules, which can be connected using SPI, I2C, UART communication protocols, additional sensors can be connected, such as an IMU (Inertial Measurement Unit) and a GPS (Global Positioning System) unit.
Regarding point 2, in the future I am planning to interface a cheap IMU board, such as MPU6050, and also a cheap GPS board, such as the Ublox Neo 6M. The connectors are already equipped on this proto2 PCB board (1x UART 4-pin connector, 1x SPI 6-pin connector, 1x I2C 4-pin connector).
If you are interested in my Fuelino project, please contact me (just search "dadez87" on Google and you will find me). I can also provide you some PCBs and components, or the complete soldered board, if you give a small contribution for shipment and development costs. You can test this board on most of the motorcycles, on the market, equipped with electronic PFI (Port Fuel Injection) system. This Fuelino board can handle up to 2 injectors, so it is addressed to 1 or 2 cylinders engines. Most of the motorcycles on the market, even small scooters, are now equipped with 4-strokes engines, and strict regulations are now banning carburetors, forcing main manufacturers (Honda, Kawasaki, Yamaha, Suzuki, Ducati, Aprilia, Piaggio, and so on) to use electronic fuel injection even on small engines.
If you have a scooter, or a motorcycle, such as Honda CBR125R, Kawasaki Ninja 250, Honda CBR250R, and so on, I can help you with mounting instructions. The most simple installation requires 4 signals only: injector + (12V), injector - (command IN, from original ECU), chassis ground (GND), injector - (command OUT, modified by Fuelino).
Hi my name is jay, and I was wondering where I could buy this, the other thing is could you make it for 4 injectors that's continuous flow